User provisioning allows you to use an external user directory (identity provider) to manage users in your BlogIn account.
Prerequisites
BlogIn supports user provisioning with an identity provider that supports SCIM 2.0 protocol, such as Okta, Azure AD or Google.
User provisioning via SCIM is available to all BlogIn blog accounts, but you must be an Administrator of your blog to be able to set up and configure User provisioning for your blog.
You also must have sufficient privileges on the Identity provider side to configure User provisioning with BlogIn (usually administrator role is required).
Supported operations
BlogIn supports the following User provisioning operations:
- Create Users
- Update User Attributes
- Deactivate Users
- Import Users
- Import Groups
- Assign Users to Teams from Groups
- Password Sync
Step 1: Enable User provisioning on BlogIn
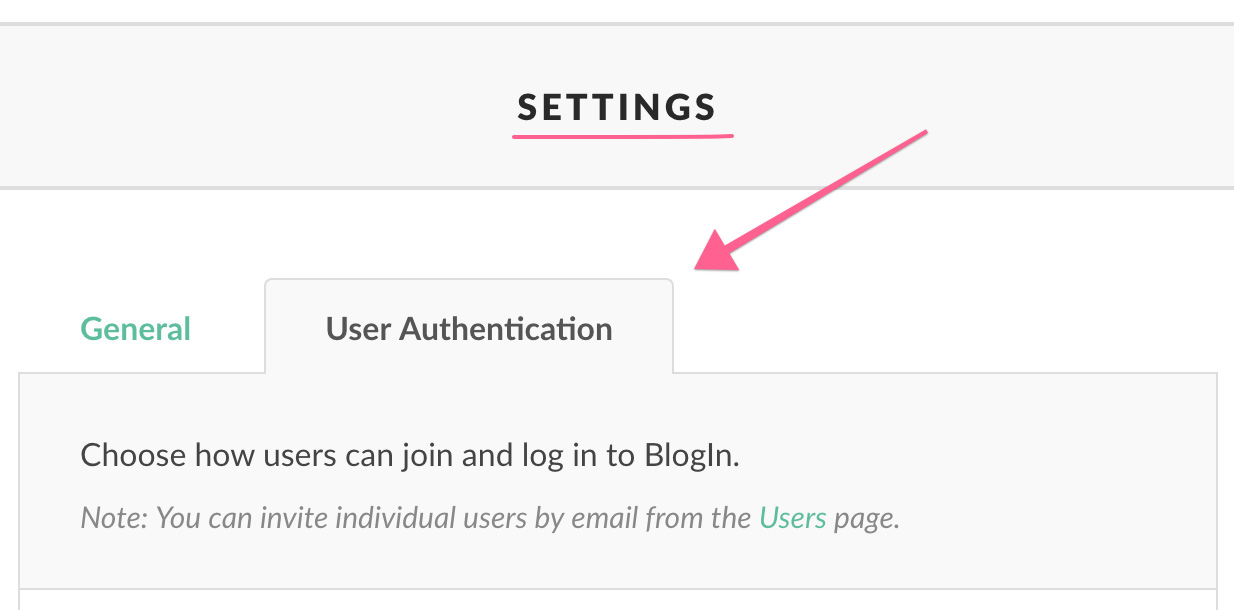
Log in to your BlogIn account and go to Settings in the sidebar on the left and switch to the User Authentication tab.
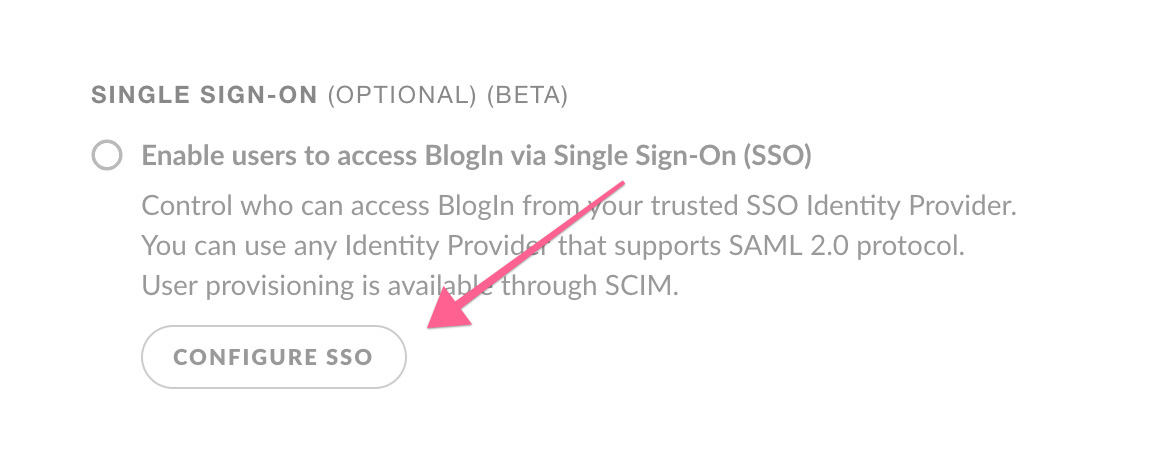
Scroll down and click on the Configure SSO button.
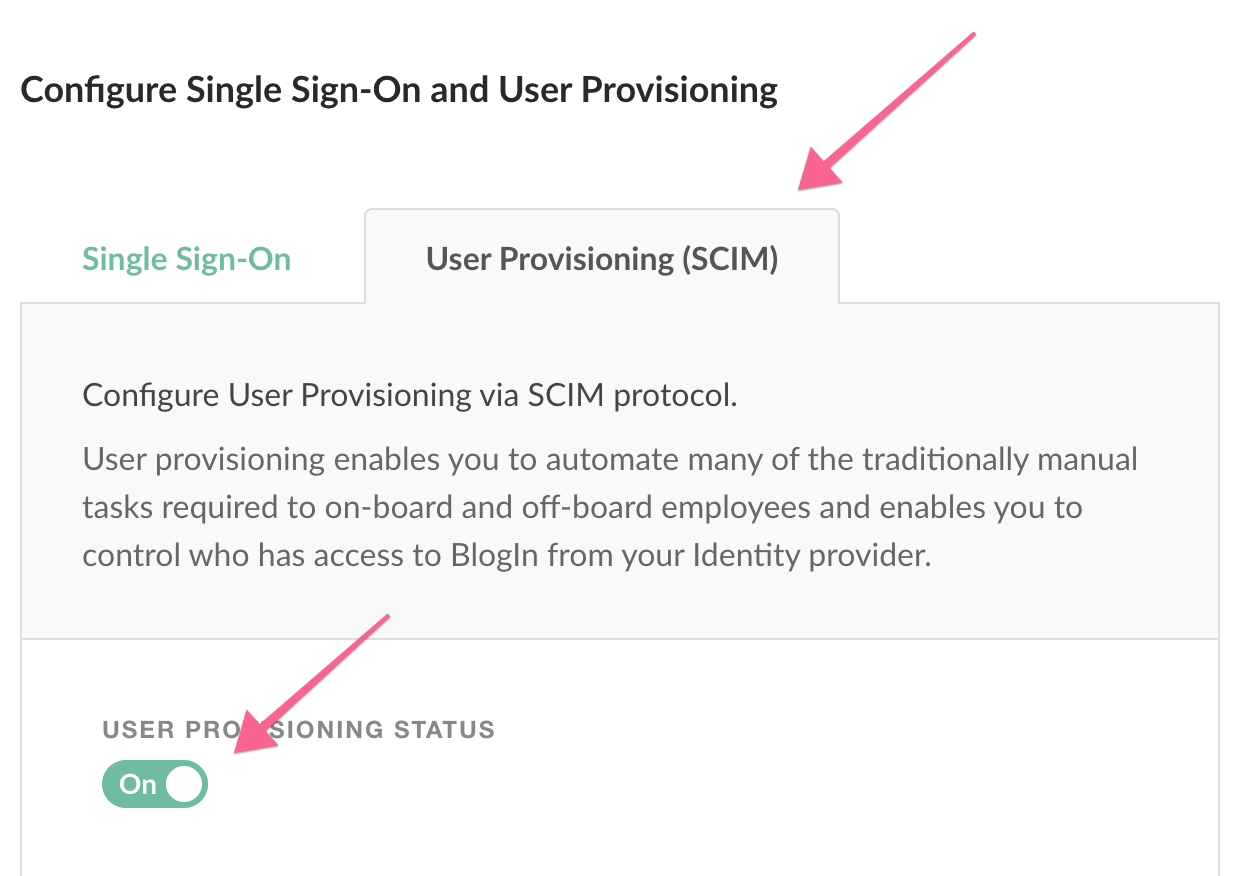
Switch to the User provisioning tab and change User provisioning status to On.
Click the Save changes button.
Upon first save, the Secret (bearer) token will be generated.
Copy Base (Tenant) URL and Secret (Bearer) token values and use them to set up user provisioning on your identity provider.
Step 2: Configure User Provisioning on your Identity provider
Log in to your identity provider, add (or create) the BlogIn app and use Base (Tenant) URL and Secret (Bearer) token to set up User provisioning with BlogIn.