Single sign-on (SSO) enables users to securely authenticate with multiple applications and websites by logging in only once—with just one set of credentials (username and password). With SSO, the application or website that the user is trying to access relies on a trusted third party (Identity provider) to verify that users are who they say they are.
You can use SSO to control who can access your internal blog on BlogIn using an Identity provider (IdP) that supports SAML 2.0 protocol, such as Okta, Microsoft Azure Active Directory, OneLogin, Google.
How to set up single sign-on (SSO) for G Suite (Google) or
How to set up single sign-on (SSO) for Microsoft Azure Active Directory.
Configure Single Sign-On
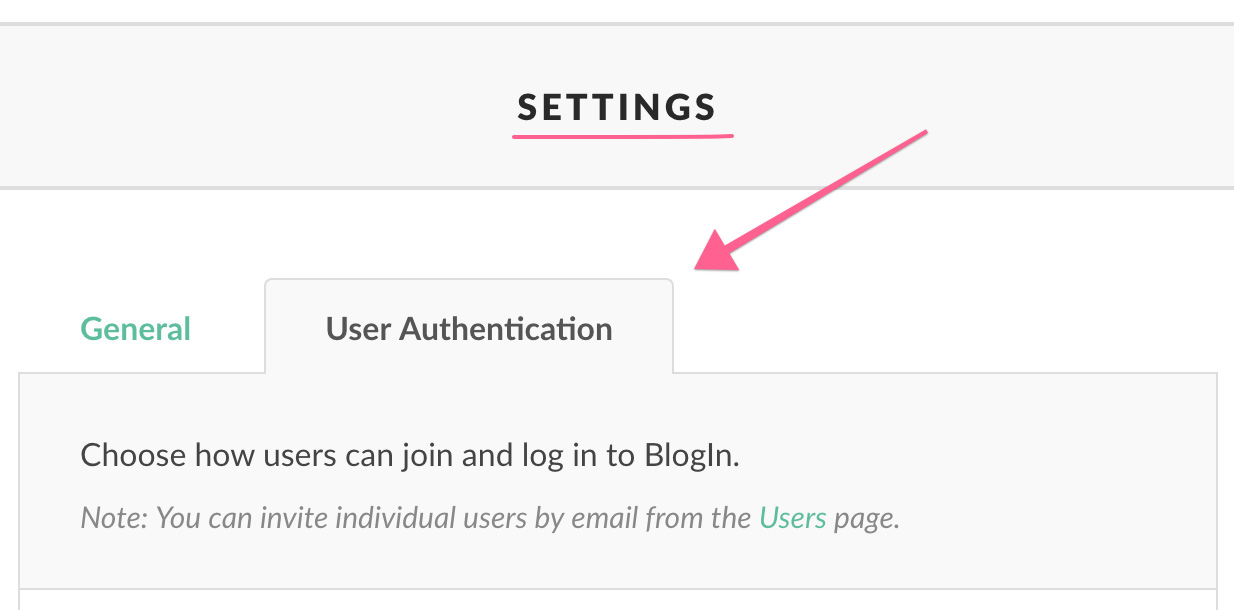
To configure Single Sign-On go to User Authentication tab on the Settings page of your BlogIn account. Please note that you must be an Administrator to be able to access this page.
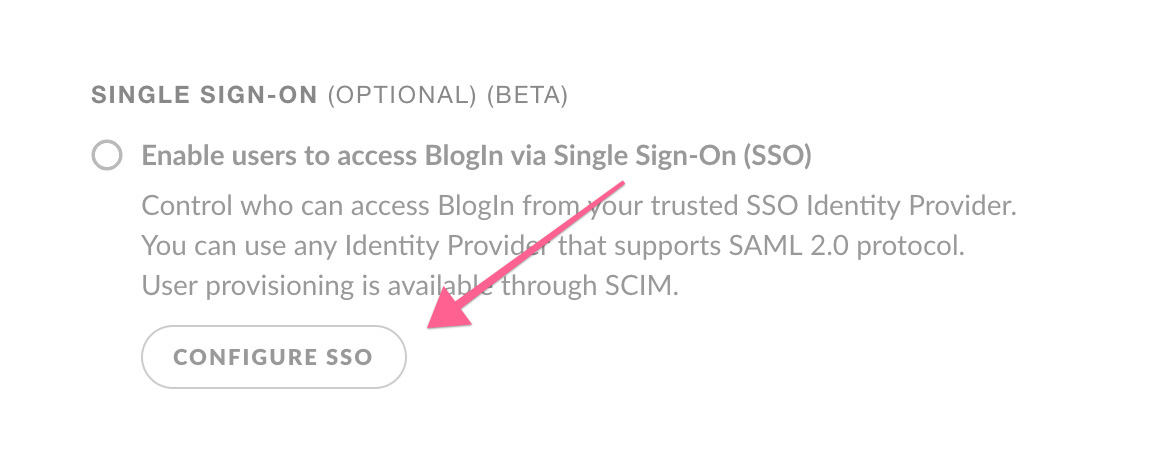
Scroll to the bottom of the page to the Single Sign-On section and click the Configure SSO button.
Configure BlogIn to work with your Identity Provider
Follow on-screen instructions to configure BlogIn with the configuration data provided by your Identity Provider.
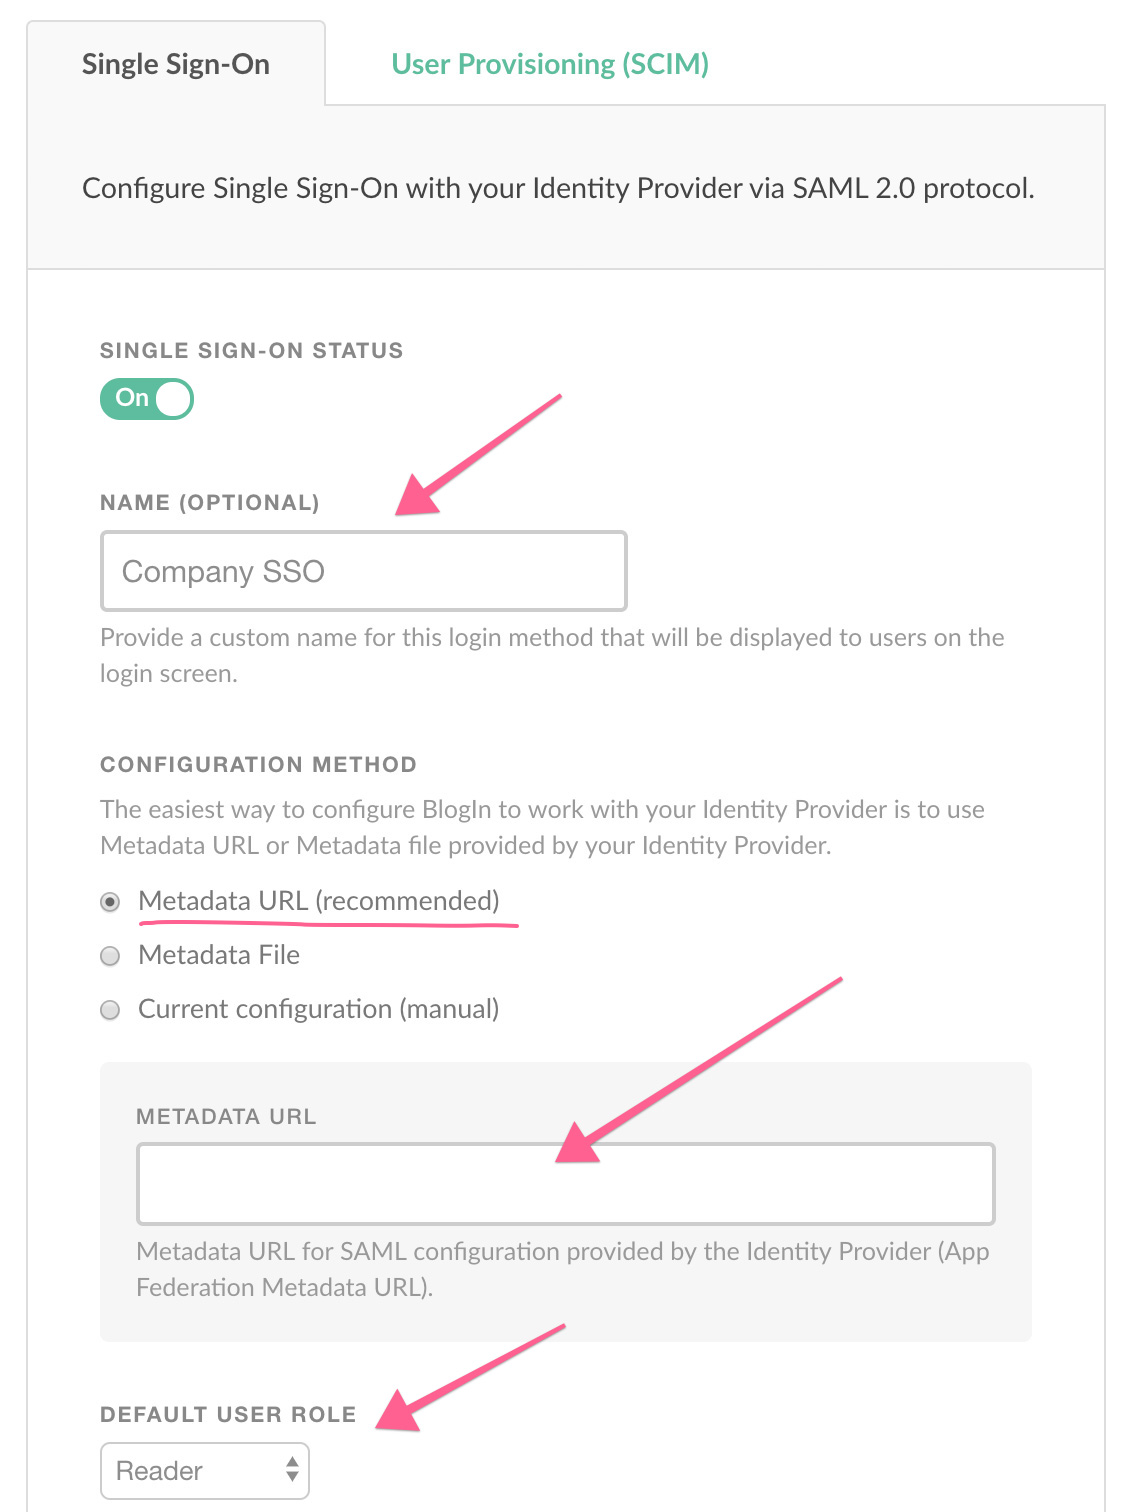
Choose a custom name for this login method that will be displayed on the login screen. Choose Configuration Method (Metadata URL or Metadata file is recommended).
If you chose manual configuration method, populate Identity Provider SSO URL (Login URL) and Identity Provider Issuer (entity ID) and upload the Certificate you got from your Identity Provider.
Set the default user role (access level) for new users joining BlogIn via SSO.
Click the Save Changes button.
Configure your Identity Provider to work with BlogIn
To complete the SSO configuration you need to configure your Identity provider to work with BlogIn. Use the configuration data provided at the bottom of the SSO configuration screen.
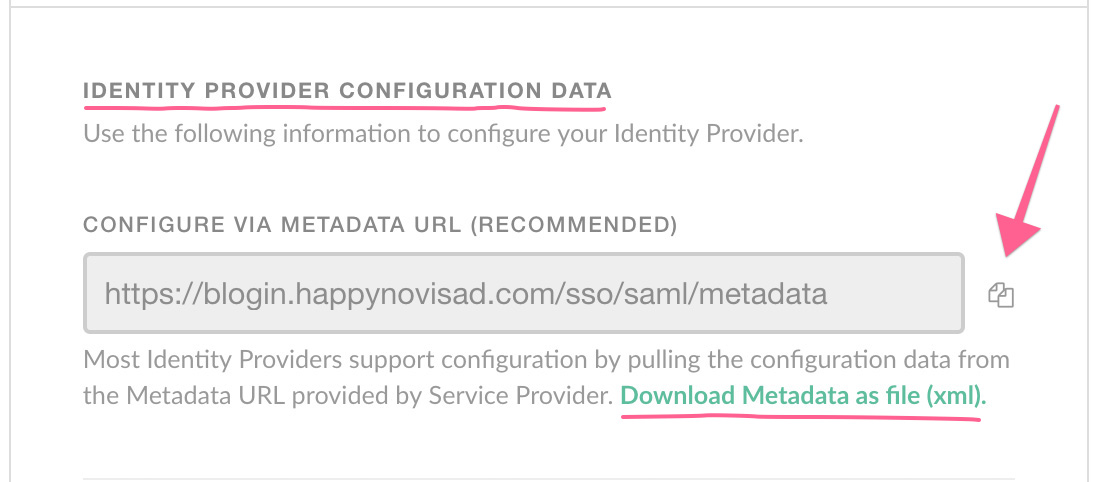
If your identity provider supports it, the easiest way is to use the Metadata URL. Just copy the URL from the Metadata URL field and paste it in the correct field on your Identity Provider. You can also download configuration data as an XML file and upload it to your Identity Provider.
Attribute mappings
Blogin uses the email address as the default Name ID / unique user identifier for Single Sign-On. Your Identity Provider must send the user’s email address as the primary identifier.
In addition to email, Blogin supports the following user attributes, which should be sent using these exact attribute names:
-
firstname -
lastname -
phone -
title
When provided, these attributes are automatically mapped to the user’s profile in Blogin.
Group synchronization is also supported. SSO groups must be mapped to an attribute named groups, which Blogin uses to assign users to teams according to your SSO configuration. When the "Create new teams from SSO groups" option is enabled in the SSO configuration, Blogin will automatically create new teams that match the groups your identity provider sends during SSO login. These teams will be managed by your SSO identity provider.
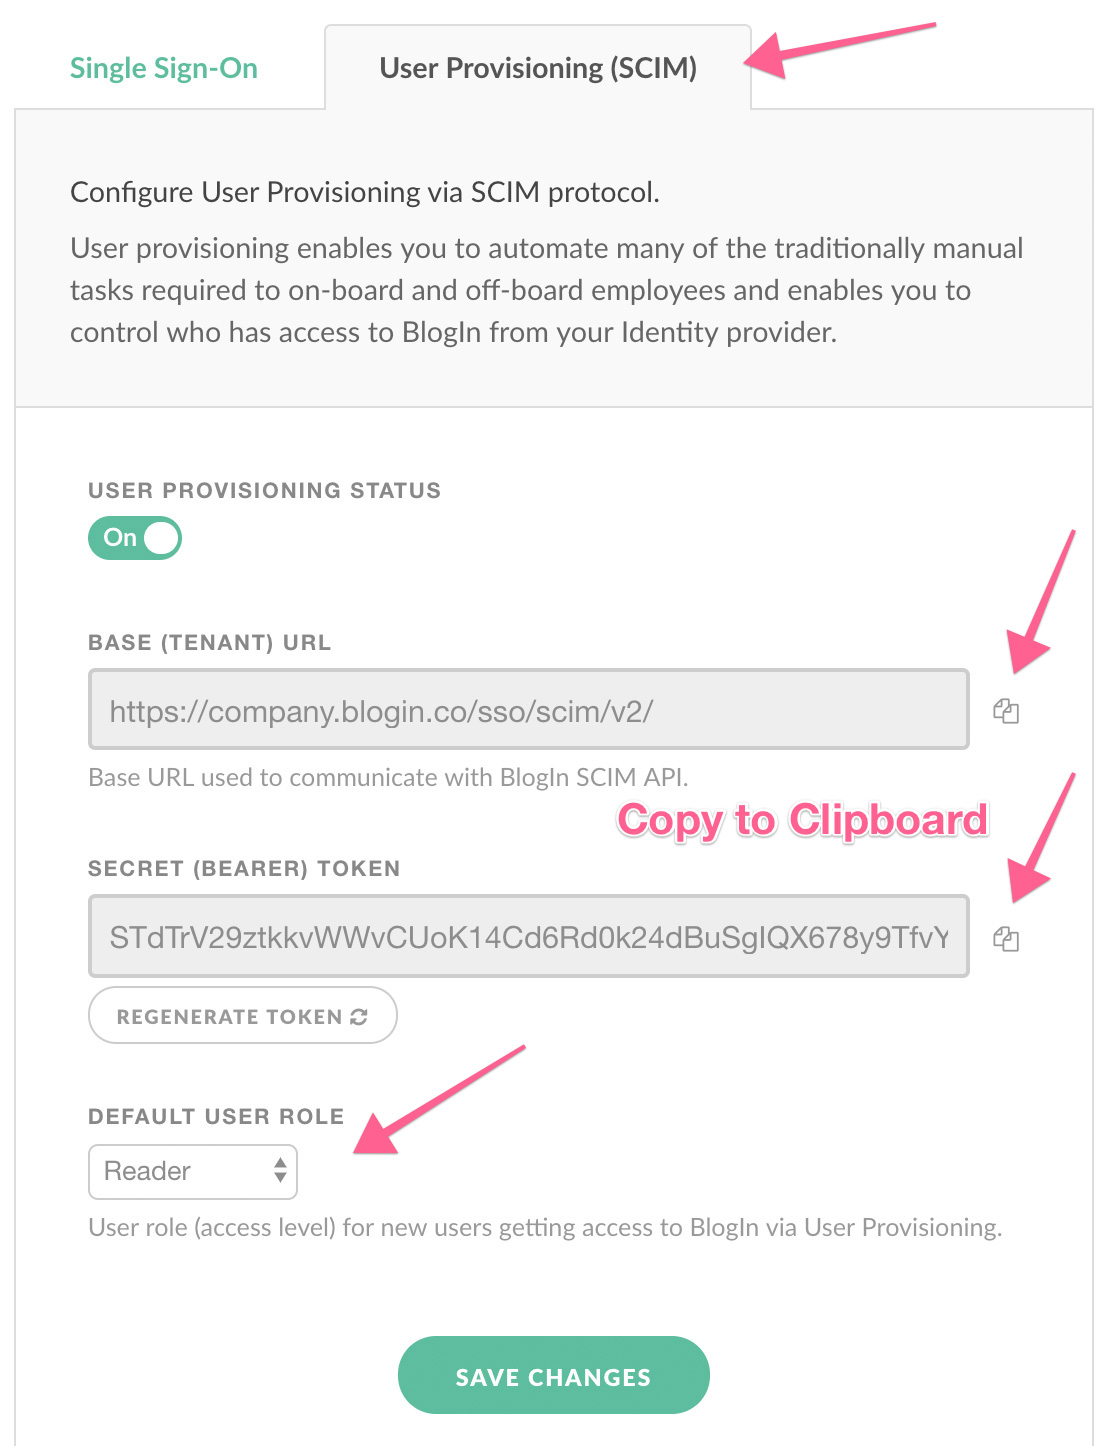
Configure User Provisioning via SCIM (optional)
User provisioning enables you to automate many of the traditionally manual tasks required to onboard and offboard employees and enables you to control who has access to BlogIn from your Identity Provider.
If your Identity Provider supports User Provisioning via SCIM protocol, switch to the User Provisioning tab and use the configuration data to configure User Provisioning on your Identity Provider.
Click Save Changes to confirm any changes you made on this page.
Have questions or need help?
If you have any questions or need help in setting up SSO feel free to contact our friendly support team at support@blogin.co.