ln this tutorial, you'll learn how to integrate BlogIn with Azure Active Directory (Azure AD). When you integrate BlogIn with Azure AD, you can:
- Control in Azure AD who has access to BlogIn.
- Enable your users to be automatically signed-in to BlogIn with their Azure AD accounts.
- Manage your accounts in one central location - the Azure portal.
Prerequisites: Ensure that you are the administrator of your BlogIn account and that you have an Azure AD subscription.
Adding BlogIn on Azure AD
To configure the integration of BlogIn into Azure AD, you need to add BlogIn from the gallery to your list of managed SaaS apps.
- Sign in to the Azure portal using either a work or school account, or a personal Microsoft account.
- On the left navigation pane, select the Azure Active Directory service.
- Navigate to Enterprise Applications and then select All Applications.
- To add new application, select New application.
- In the Add from the gallery section, type BlogIn in the search box.
- Select BlogIn from results panel and then add the app. Wait a few seconds while the app is added to your tenant.
Configure Azure AD SSO
Follow these steps to enable Azure AD SSO in the Azure portal.
-
In the Azure portal, on the BlogIn application integration page, find the Manage section and select single sign-on.
-
On the Select a single sign-on method page, select SAML.
-
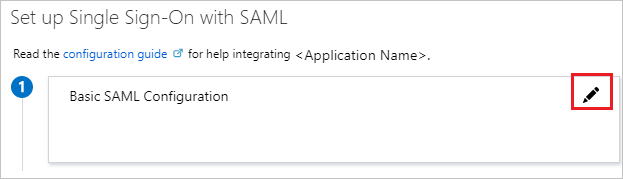
On the Set up single sign-on with SAML page, click the edit/pen icon for Basic SAML Configuration to edit the settings.
-
On the Basic SAML Configuration section, enter the values for the required fields.
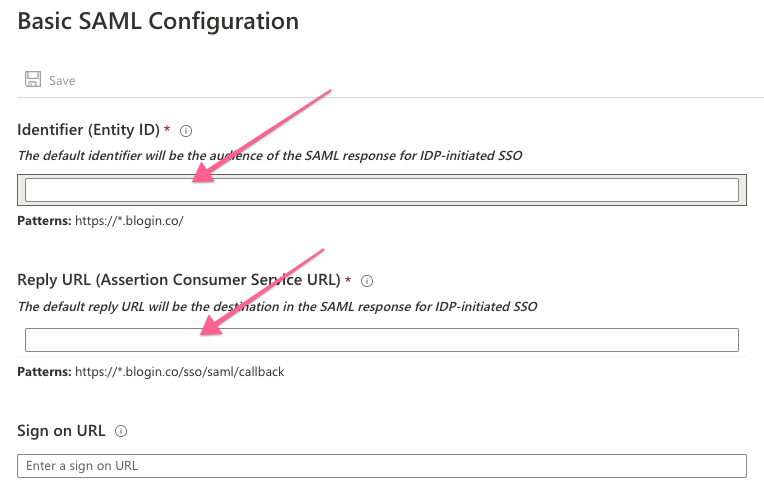
a. In the Identifier text box, type a URL using the following pattern:
https://<SUBDOMAIN>.blogin.co/b. In the Reply URL text box, type a URL using the following pattern:
https://<SUBDOMAIN>.blogin.co/sso/saml/callbackYou can get the exact values for these fields on the Settings page on BlogIn (User Athentication tab > Configure SSO and User Provisioning).c. (optional) if you wish to configure the application in SP initiated mode, in the Sign-on URL text box, type a URL using the following pattern:
https://<SUBDOMAIN>.blogin.co/
Note: In SP initiated mode, users will always be redirected to the BlogIn login page to login by clicking the Login with SSO button. -
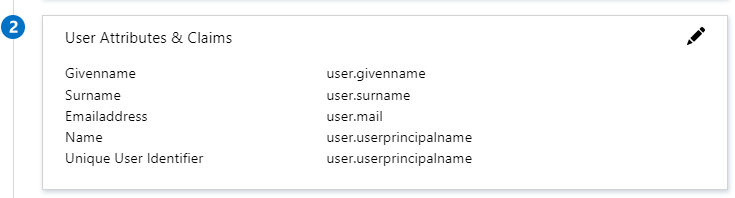
BlogIn application expects the SAML assertions in a specific format, which requires you to add custom attribute mappings to your SAML token attributes configuration. The following screenshot shows the list of default attributes.
-
In addition to above, BlogIn application expects few more attributes to be passed back in SAML response which are shown below. These attributes are also pre populated but you can review them as per your requirements.

-
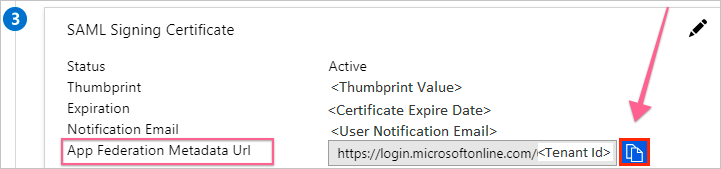
On the Set up single sign-on with SAML page, In the SAML Signing Certificate section, click copy button to copy App Federation Metadata Url and save it (you will need it on the next step).
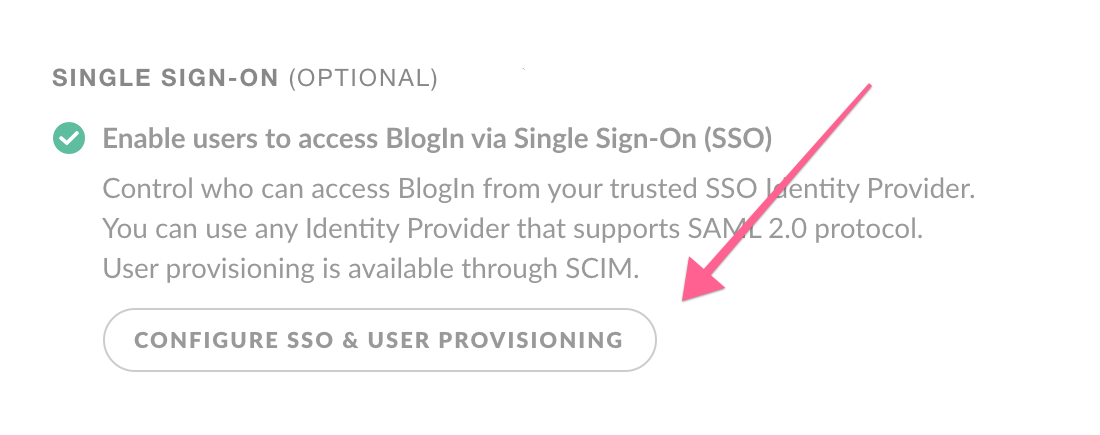
Configure SSO on BlogIn
Login to your BlogIn account and go to Settings > User Authentication tab > Configure SSO & User provisioning.
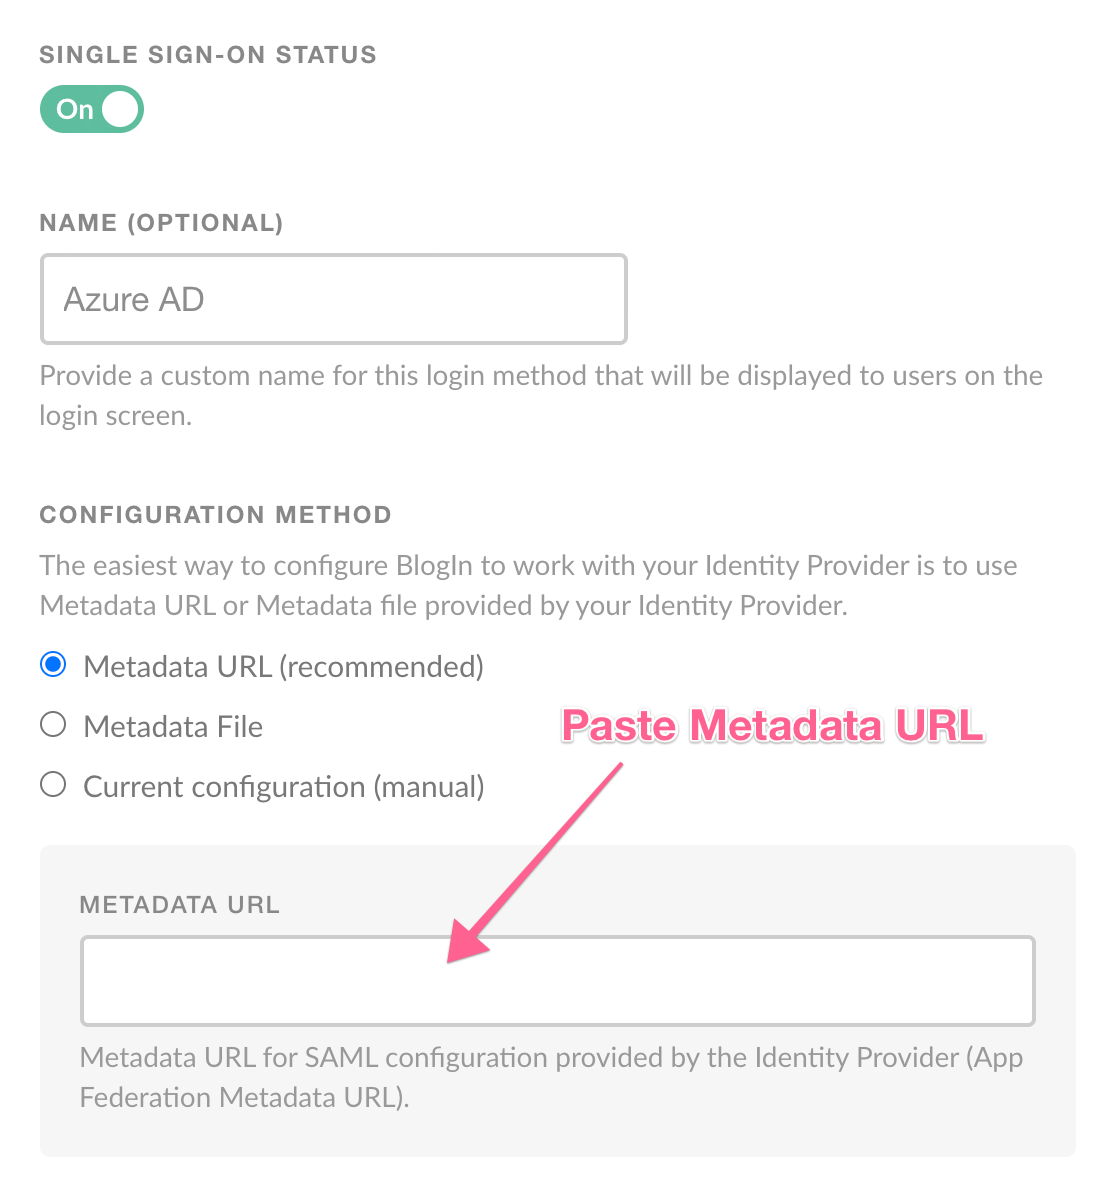
On the next screen, change Single Sign-On status to On and choose a custom name for SSO Login button that will be displayed on the login screen.
Choose Configuration Method (Metadata URL or Metadata file is recommended) and populate the required fields.
If you saved the App Federation Metadata Url in the last step of the previous section, paste that URL into the Metadata URL field.
Otherwise, change the Configuration method to manual and manually populate Identity Provider SSO URL (Login URL) and Identity Provider Issuer (entity ID) and upload the Certificate (base64) you got from Azure AD.
Choose default user role for new users joining BlogIn using SSO.
Click Save changes.
Test SSO
The setup is now complete and you can test if SSO is working. Assign a user to BlogIn in Azure AD and try to log in to BlogIn using the SSO method. If a user already exists on BlogIn, the user should be logged in. If the user does not exist on BlogIn, a new user will be created and the user will be logged in.